
Picture this: It’s a lazy Sunday afternoon, and your kitchen fills with the rich, mouthwatering aroma of beef bone broth simmering on the stove. There’s something almost magical about that smell, isn’t there? This “liquid gold” has been a kitchen staple across cultures for centuries—and with good reason! It’s not just the foundation for countless delicious recipes; it’s also packed with nutrients that have home cooks and health enthusiasts alike falling in love with it all over again.
I’m excited to share with you my go-to beef bone broth recipe that’s earned a whopping 4.6/5 star rating from fellow home cooks. Together, we’ll create a bone broth that’s bursting with flavor and goodness—I promise it’s worth every minute it spends bubbling away on your stove!
What Makes Beef Bone Broth So Special?
You might be wondering—what’s the big deal about bone broth? Isn’t it just stock? Not quite! While they might look similar, bone broth goes the extra mile with a long, slow simmer that coaxes out collagen, minerals, and other goodness from the bones and connective tissues. Think of it as stock’s more nutritious, patient cousin.
All that simmering releases amino acids like glycine and proline—nutrients that help support your joints, digestion, and can even give your skin a healthy glow. (Who doesn’t want that side benefit from their soup base?)
What I love most about bone broth is how it pulls double-duty in the kitchen—it’s both a flavor-packed cooking ingredient and a nutritional powerhouse you can sip like tea. Trust me, once you’ve tasted homemade bone broth, those store-bought cartons will start gathering dust in your pantry. The depth of flavor just doesn’t compare!
Essential Ingredients for Perfect Beef Bone Broth
Let’s Talk Bones – The Heart of Your Broth
Your broth is only as good as the bones you use—they’re the star of the show here! For the richest, most flavorful result, you’ll need:
- 3½ pounds of beef bones (I recommend a mix of oxtail, short rib, knuckle, and shank)
Why this mix? Each type brings something special to your pot:
- Oxtails give you that deep, meaty flavor that makes you go “mmm”
- Knuckle bones are collagen powerhouses (hello, silky broth!)
- Marrow bones add a velvety richness that’s absolutely divine
- Meat-attached bones like short ribs contribute extra layers of flavor
A little tip from my kitchen to yours: If you can get bones from grass-fed cattle, grab them! I’ve found fantastic options at local butcher shops and farmers’ markets without breaking the bank. Don’t be shy—ask your butcher for “soup bones” and they’ll know exactly what you need.
Veggie Power Players
To build a flavorful base that complements those beautiful bones, you’ll need:
- 2 stalks celery, chopped into 2-inch pieces
- 1 large onion, cut into eighths
- 1 medium leek, cleaned well (don’t skip this—grit is no friend to good broth!) and cut into 2-inch pieces
- 1 whole head of garlic, just cut it in half crosswise—papery skin and all
- 2 bay leaves for that subtle herbal note
Bringing It All Together
To finish your ingredient lineup:
- About 12 cups of water (enough to cover your bones)
- 1 tablespoon white vinegar (this is your secret weapon—it helps pull minerals from the bones)
- 1 teaspoon salt
- 1 teaspoon ground black pepper
Nothing fancy here, but these simple ingredients will transform into liquid gold with a little time and patience.
Kitchen Gear Round-Up
Before we roll up our sleeves, let’s make sure you’ve got the right tools for the job:
- A large roasting pan (the one you might use for Thanksgiving turkey works perfectly)
- A heavy-bottomed stock pot (aim for at least 8-quarts—this isn’t the time to squeeze ingredients into a too-small pot!)
- A fine-mesh strainer to catch all those bits when it’s time to strain
- Some storage containers—I love glass jars for the fridge and freezer-safe containers for longer storage
- A ladle or large spoon for skimming off foam (we want clear, beautiful broth!)
- Got cloudiness concerns? A piece of cheesecloth can work wonders for crystal-clear broth, but it’s totally optional
Don’t worry if your kitchen isn’t stocked like a restaurant—most home cooks have these basics already. And if not? This might be your excuse to invest in that big stock pot you’ve been eyeing!
Let’s Make Some Magic: Your Step-by-Step Guide
First Up: Roasting (Don’t Skip This!)
- Crank your oven to 450°F (230°C)—we want it hot!
- Spread those beautiful bones in a single layer on your roasting pan. Give them space to brown evenly.
- Pop them in the oven for about 40 minutes, but flip them halfway through. Your nose will thank you for the amazing aroma that’s about to fill your kitchen!
- This roasting step isn’t just for fun—it’s where the magic happens! That browning creates what food scientists call the Maillard reaction, which is fancy talk for “makes everything taste amazing.” This is what gives your broth that deep, rich flavor that makes store-bought versions pale in comparison.
The Long Simmer (Patience Pays Off)
- Transfer those gorgeously browned bones to your stock pot.
- Toss in your celery, onion, leek, garlic, and bay leaves—all those aromatic veggies that’ll infuse your broth with layers of flavor.
- Pour in enough water to cover everything (about 12 cups for most pots).
- Add your tablespoon of white vinegar—this helps draw minerals from the bones. Don’t worry, you won’t taste it in the final product!
- Sprinkle in your salt and pepper.
- Bring the whole pot to a boil, then immediately dial it back to a gentle simmer. We want bubbles that lazily break the surface—not a rolling boil.
- Now comes the true test of patience: let it simmer uncovered for 12 hours. Yes, really! This is where many recipes cut corners, but those 12 hours are what transform ordinary stock into nutrient-rich bone broth.
- Throughout the cooking process, you’ll notice foam and impurities floating to the top. Just skim these off with your ladle—they can make your broth cloudy and affect the flavor.
- Keep an eye on the water level and add more if needed to keep everything submerged.
I usually start my broth in the morning on a weekend day when I’m puttering around the house. The amazing smell makes the waiting easier, I promise!
Finishing Touches
- Once your 12 hours are up, let the broth cool slightly (it’ll be piping hot!).
- Strain it through your fine-mesh strainer into a large container. Say goodbye to all those spent bones and veggies—they’ve given their all for your broth.
- Let it cool completely to room temperature before refrigerating. (Food safety first!)
- Pop it in the fridge overnight.
- The next morning, you’ll notice something cool has happened—a layer of fat has hardened on top. Scrape this off with a spoon for a cleaner-tasting broth. (Though if you’re using bones from grass-fed animals, you might want to save this fat for cooking—it’s liquid gold in its own right!)
- Portion your beautiful broth into containers.
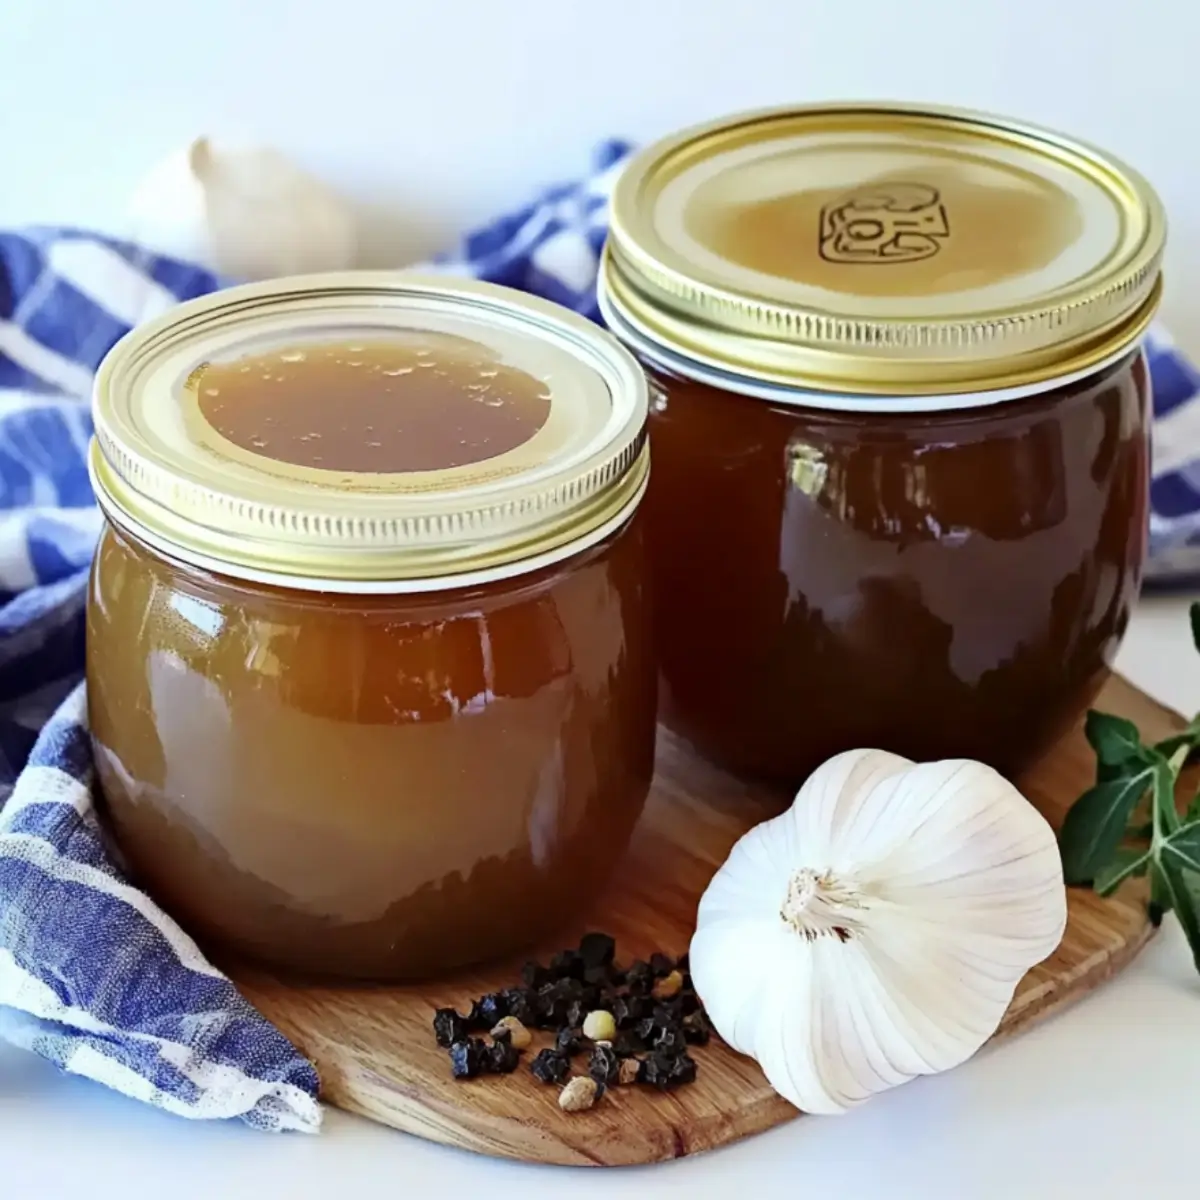
Keeping Your Liquid Gold Fresh
- Your broth will stay fresh in the refrigerator for about 5 days.
- For longer storage, freeze it for up to 6 months.
- My favorite kitchen hack: freeze some in ice cube trays, then transfer the frozen cubes to a zip-top bag. This gives you perfect small portions to add to recipes when you just need a splash of flavor!
Beyond the Numbers: Nutritional Goodness
If you look at bone broth purely by the numbers, you might wonder what all the fuss is about:
- Just 18 calories per serving
- 0g fat (once you’ve skimmed it)
- 4g carbs
- 1g protein
But here’s the thing—traditional nutrition labels don’t capture what makes bone broth truly special. They can’t measure the minerals like calcium, magnesium, and phosphorus that leach from the bones during that long simmer. They don’t show the collagen and amino acids that support your joints and skin. It’s like judging a book by its cover!
Think of bone broth as a whole-body tonic that happens to taste delicious. Many people, myself included, notice improvements in digestion, joint comfort, and even skin appearance after adding bone broth to their regular routine. While I’m not making medical claims here, there’s a reason grandmothers around the world have been pushing their bone broths for generations!
Beyond Soup: Putting Your Bone Broth to Work
Now that you’ve got this liquid treasure, let’s talk about how to use it! While sipping it straight from a mug is wonderful (especially on a cold day), your homemade broth can elevate just about anything you cook:
- Transform a simple French onion soup into something restaurant-worthy
- Whip up gravies and sauces that will have everyone asking for your secret (I won’t tell if you don’t!)
- Ditch water when cooking rice, quinoa, or farro—the flavor boost is incredible
- Turn tough, inexpensive cuts of meat into fork-tender delights by braising them in your broth
- Add a splash to your taco meat for that “what’s in this? it’s amazing!” factor
- Warm a mugful with just a pinch of sea salt when you’re feeling under the weather or need a pick-me-up
- Make a risotto that will impress even your Italian grandmother
I keep bone broth cubes in my freezer and find myself reaching for them almost daily. Last night, I turned a bland stir-fry into something memorable with just two cubes of broth added to the sauce. The possibilities are endless!
When Things Go Sideways: Troubleshooting Tips
Even experienced broth-makers hit snags sometimes. Here’s how to fix the most common issues:
Help! My broth looks cloudy
Don’t worry—it’ll still taste great, but for that Instagram-worthy clear broth: Keep it at a gentle simmer (no vigorous boiling), skim religiously throughout cooking, and consider straining through cheesecloth next time. I learned this the hard way after my first few batches looked more like muddy water than luxury broth!
My broth didn’t gel in the fridge
Been there! The gel comes from collagen, so make sure your bone mix includes plenty of joints, knuckles, and feet (yes, feet—they’re collagen goldmines). If your broth stays liquidy after refrigeration, you might have used too much water. Try reducing it over low heat to concentrate, or adjust your bone-to-water ratio next time.
Tastes a bit meh
Even the best recipes sometimes need tweaking. Try these fixes: Roast those bones until they’re deeper brown next time, throw in more aromatics, or simply simmer your finished broth to reduce and concentrate the flavors. A splash of fish sauce (I know it sounds weird, but trust me) can also add incredible depth without making your broth taste fishy.
Questions You’re Probably Wondering About
What ingredients should stay OUT of my bone broth?
I learned some of these the hard way, so let me save you the trouble:
- Skip the cabbage family (broccoli, Brussels sprouts, cauliflower)—unless you want your house smelling like a science experiment gone wrong and your broth tasting bitter
- Leave out starchy veggies like potatoes—they’ll cloud your broth and change the texture
- Go easy on salt—you can always add more when you’re using the broth in recipes
- Save those fresh herbs for later—after 12 hours of simmering, they’ll turn bitter and disappointing
- Don’t go crazy with acidic ingredients—that tablespoon of vinegar is enough to do the mineral-extracting job
Which bones make the BEST broth?
After many batches of trial and error, I’ve found this mix works wonders:
- Knuckle bones: these collagen powerhouses create that desirable gel
- Marrow bones: they contribute incredible richness and nutrients
- Oxtail: adds meaty flavor that can’t be beat (plus bonus gelatin)
- Feet and joints: sounds strange, but they’re gelatin gold mines
- Some meat-attached bones like short ribs: these add depth and complexity
My secret? I never use just one type. Always mix at least 2-3 different bones in each batch for the most well-rounded flavor and nutritional profile.
Why does bone broth sometimes make me feel weird?
Don’t worry, you’re not alone! Some people (myself included, initially) notice some changes when they first start drinking bone broth regularly:
- It contains natural histamines, which some people are sensitive to
- The amino acid glutamine affects some folks, especially in larger amounts
- Your body might be having a “wait, what’s all this good stuff?” reaction as it adjusts
- You could have a sensitivity to one of the ingredients used
My advice? Start small—maybe just a quarter cup daily—and work your way up slowly. If you continue feeling off, a chat with your healthcare provider is a smart move.
Can I skip the roasting step and just boil the bones?
Technically yes, but would you skip browning meat before making a stew? Same principle! Boiling without roasting is like listening to music with one ear covered—you’re missing half the experience:
- You’ll lose that deep, rich flavor that only comes from browning
- Your broth will likely be cloudier (if appearance matters to you)
- The complexity and depth of flavor will suffer significantly
The roasting step takes just 40 minutes but makes all the difference between “meh” broth and “WOW” broth. Similarly, that 12+ hour simmer isn’t just me being fussy—it’s what extracts all those good-for-you compounds that make bone broth special in the first place.
Cooking for the Planet (and Your Wallet)
One of my favorite things about making bone broth is how wonderfully sustainable it is. Think about it—we’re taking parts that might otherwise end up in the trash and transforming them into something absolutely spectacular.
This nose-to-tail approach honors the whole animal and reflects how our grandparents and great-grandparents cooked—nothing went to waste. It feels good knowing I’m being both environmentally mindful and economical.
There’s something deeply satisfying about this kitchen alchemy—turning what some people consider scraps into liquid gold that high-end health food stores charge $10-15 per quart for! My wallet and my conscience both appreciate this thrifty magic.
Worth Every Minute
I won’t sugarcoat it—this recipe asks for your time and patience. But I promise you, that first spoonful will make you realize why those 12 hours were absolutely worth it. From those 12 servings, you’ll create countless meals that sing with flavor while nourishing your body from the inside out.
Don’t just take my word for it. Over on AllRecipes, 34 other home cooks have successfully made this recipe, giving it a stellar 4.6/5 star rating. That’s the kind of track record that tells you this recipe delivers on its promises.
The beautiful thing about bone broth? It’s both science and art. This recipe gives you a solid foundation, but don’t be afraid to make it your own. Maybe you love more garlic, or perhaps you want to experiment with different herb combinations. With each batch, you’ll refine your process until you’ve created your signature broth—one that reflects your taste and becomes a cornerstone of your cooking.
I’d love to hear about your bone broth adventures! Have you made it before? What’s your favorite bone combination? Any special ingredients you swear by? Drop a comment below and let’s compare notes!
Print4-Ingredient Beef Bone Broth Recipe (No Flour, Dairy-Free, Cozy)

A detailed guide to making a rich, nutritious beef bone broth.
- Prep Time: 50 minutes
- Cook Time: 12 hours 40 minutes
- Total Time: 13 hours 30 minutes
- Yield: 12 servings 1x
- Category: Broth
- Method: Simmering
- Cuisine: Traditional
- Diet: Gluten Free
Ingredients
- 3½ pounds beef bones (mix of oxtail, short rib, knuckle, and shank)
- 2 stalks celery, chopped into 2-inch pieces
- 1 large onion, cut into eighths
- 1 medium leek, cleaned and cut into 2-inch pieces
- 1 whole head of garlic, halved crosswise
- 2 bay leaves
- About 12 cups of water
- 1 tablespoon white vinegar
- 1 teaspoon salt
- 1 teaspoon ground black pepper
Instructions
- Preheat oven to 450°F (230°C).
- Place bones in a single layer on a roasting pan and roast for 40 minutes, flipping halfway.
- Transfer roasted bones to a large stock pot.
- Add celery, onion, leek, garlic, and bay leaves to the pot.
- Pour in about 12 cups of water to fully cover the ingredients.
- Stir in vinegar, salt, and pepper.
- Bring to a boil, then reduce heat to a gentle simmer.
- Simmer uncovered for 12 hours, skimming off foam and impurities occasionally.
- Let broth cool slightly, then strain through a fine mesh sieve.
- Refrigerate overnight and remove the hardened fat layer before storing or using.
Notes
- Roast the bones first – This step adds a deep, rich flavor that enhances the overall taste of your broth.
- Use a mix of bones – Combining beef, chicken, or pork bones creates a more complex and well-rounded broth.
- Strain through cheesecloth – For a clear and clean broth, strain it through cheesecloth after simmering.
- Store smart – Broth can be kept in the refrigerator for up to 5 days or frozen for up to 6 months.
- Freeze in cubes – Use ice cube trays to freeze broth in small portions, making it easy to use for sauces or quick meals.
Nutrition
- Serving Size: 1 cup
- Calories: 18
- Sugar: 0g
- Sodium: 1 teaspoon of salt used in preparation
- Fat: 0g after skimming
- Saturated Fat: 0g
- Unsaturated Fat: 0g
- Trans Fat: 0g
- Carbohydrates: 4g
- Fiber: 0g
- Protein: 1g
- Cholesterol: 0mg
Keywords: beef bone broth, homemade broth, nutritious broth, cooking broth