
You know that feeling when you take your first bite of a perfectly made corned beef hash recipe? That magical moment when crispy potatoes, savory beef, and sweet caramelized onions come together on your fork?
It’s comfort food at its finest – somehow both homey and sophisticated at the same time. Maybe you’re looking to transform your St. Patrick’s Day leftovers, or perhaps you’re craving this classic from scratch. Either way, I’m going to walk you through everything you need to know to turn these simple ingredients into something that’ll make your taste buds sing. Let’s dive into what makes a truly great hash tick!
Selecting the Perfect Corned Beef Hash
Let’s talk about the star of the show – the corned beef itself. Your hash is only going to be as good as what you put into it, and picking the right corned beef makes all the difference in how your final dish turns out.
Types of Corned Beef (Ranked by Quality)
- Homemade corned beef – The gold medal winner, hands down. When you cure your own brisket at home, you’re in the driver’s seat – you pick the quality of the meat, control what goes into the cure, and can tweak the flavors exactly how you like them. I won’t lie – it takes planning (usually 5-7 days of brining), but the payoff is absolutely worth it if you have the time.
- Store-bought raw corned beef that you cook yourself – Think of this as the happy middle ground. You skip the brining wait time, but still get to control how it’s cooked. These pre-brined briskets show up in most supermarkets (they’re practically everywhere come March) and give you that homemade taste without the week-long prep.
- Hot corned beef from grocery store hot food stations – Need hash in a hurry? This ready-to-go option can work surprisingly well, especially if you’re grabbing it from a quality deli or specialty market where they’re constantly making fresh batches.
- Canned corned beef – The “it’s 10 PM and I need hash now” option. Super convenient, though you’ll typically want to grab two cans for a standard recipe to make sure you’re not skimping on the beef-to-potato ratio.
- Deli counter sliced corned beef – Coming in last place, but still an option when you’re in a jam. Those thin slices just don’t give you the chunky, substantial texture that makes hash so satisfying. But hey, when the craving hits and this is all you’ve got, it’ll still do the trick.
Mastering the Potato: The Scientific Approach to Perfect Hash
Let’s talk potatoes – they might seem like the simple sidekick in this recipe, but getting that perfect contrast of crispy outside and tender inside isn’t just luck. There’s actually some pretty cool science behind it, along with a few tricks that can take your hash from good to “can I please have the recipe?”
Scientific Approach to Potatoes
Ready for the pro tip that separates “meh” hash from the stuff people rave about? It’s all about par-cooking your potatoes in acidulated water (fancy way of saying “water with a splash of vinegar”). Here’s the magic behind it:
- When you add vinegar to your cooking water (just 1-2 tablespoons per quart), it firms up the pectin in the potato cell walls
- This firming effect is like giving your potatoes a structural backbone – they get tender but keep their shape instead of turning to mush
- That acid helps the potatoes stand up to the high heat you need for those beautiful crispy edges without falling apart
Skip this step, and you’ll likely end up with potatoes that are either still hard in the middle or have completely disintegrated into the pan. I’ve been there – potato mush is not the goal!
Optimal Potato Selection
Yukon Gold potatoes are the rock stars of the hash world, and for good reason:
- They hit that sweet spot of medium starch content – creamy but still hold their shape
- They brown up with this gorgeous golden crust that’ll make your mouth water
- They bring their own buttery flavor to the party, which plays perfectly with salty corned beef
- They’re quick to par-cook – usually just 5-10 minutes and they’re good to go
Russet potatoes can definitely work too, but they need a little special treatment:
- These starchy spuds need a bit more par-cooking time (about 6 minutes)
- They’re like little sponges, soaking up more fat as they cook (which isn’t necessarily a bad thing!)
- They can get a bit fragile, so you’ll need a gentler touch when stirring
Optimal Sizing & Processing
Want hash with that perfect balance of textures? Here’s how to prep those potatoes:
- Cut them into ½-inch cubes – Not too big, not too small. This size browns beautifully on the outside while staying tender inside. It’s like the Goldilocks of potato cuts.
- Drain them really well after par-cooking – Water and good browning are enemies. I like to give my potatoes a gentle shake in the colander to get rid of every last drop.
- Let them cool for at least 15 minutes – This might seem like an unnecessary waiting game when you’re hungry, but it’s actually crucial. This rest time lets the outside dry out and the starches set up.
That cooling step is one that most basic recipes skip, but it makes a world of difference. While those potatoes are cooling, their starches are actually realigning themselves, creating a surface that will get extra crispy when it hits the hot pan. Worth the wait, I promise!
Key Cooking Techniques & Texture Development
Let’s talk technique – because even with the best ingredients in the world, it’s how you handle them that turns good hash into “I can’t believe I made this at home” hash. These methods are your ticket to those perfect texture contrasts and deep flavors.
Creating the Perfect Texture
Want to make hash that rivals your favorite diner? Here’s how the pros do it:
- Cook in layers, not all at once: Think of it like building flavors one at a time
- Start with your onions, letting them get soft and sweet with just a touch of caramelization
- Then tackle those potatoes separately until they’re sporting a beautiful crust
- Add your corned beef last – it’s already cooked, so it just needs to warm through and get a little crispy on the edges
- Master the press: This might be the most important move in hash-making. Use your spatula to press everything into an even layer, then – and this is crucial – leave it alone for 3-4 minutes. That undisturbed time is when the magic happens and that golden crust forms.
- Get strategic with your fats:
- Try rendering some of the beef fat and using it to cook your potatoes (game-changer!)
- Split your butter use – some at the beginning for cooking, and a small pat right at the end for that fresh butter flavor
- Mix butter with a neutral oil like canola or grapeseed to get buttery flavor without burning
- Develop that crust: The sign of truly great hash is that golden-brown crust. I know it’s tempting to keep stirring (I’m guilty of this too), but patience pays off here. Those undisturbed minutes let the Maillard reaction work its magic, creating hundreds of new flavor compounds that make you go “wow” at first bite.
Texture Contrasts
Great hash is all about contrasting textures. Here are some tricks to take yours to the next level:
- Rethink how you cut your meat: Try 1-inch shreds instead of the usual cubes. They create more surface area for those delicious browned edges and give your hash a more interesting texture in every bite.
- Get a little sloppy with your onion cutting: Perfect, uniform cuts are great for some dishes, but for hash? Those uneven pieces are actually a benefit! Some smaller bits will caramelize deeply while larger pieces stay softer – giving you a range of flavors and textures.
- Flip and press more than once: Don’t just crisp up the bottom layer. Flip sections of your hash, press again, and let new surfaces get that crispy treatment. It’s like creating crispy pockets throughout the whole dish.
Flavor Enhancements & Variations
The classic trio of corned beef, potatoes, and onions makes a delicious hash on its own, but who says you can’t play around a bit? With a few thoughtful additions, you can take your hash from “mmm, good” to “wow, that’s amazing!”
Traditional Additions
Even the most traditional hash can benefit from these tried-and-true additions:
- Sweet onion: As they cook, those natural sugars turn into caramelized goodness that adds a depth you just can’t get any other way.
- Garlic powder and onion powder: I know it seems counterintuitive to use powdered when you could use fresh, but these dried versions actually seep into the potatoes better without burning like fresh garlic can.
- A sprinkle of herbs: Fresh parsley and thyme bring a pop of brightness that cuts through all that rich, salty beef. It’s like opening a window in a warm room – that bit of contrast makes everything better.
- Bell peppers: Green ones are traditional, adding vibrant color and a slightly bitter note that balances all the richness.
- Diced carrots: I love how one traditional recipe calls these “leprechaun gold” – such a perfect description! They add natural sweetness and little bursts of color throughout.
Creative Variations
Feeling a bit adventurous? Here are some twists that still honor the spirit of traditional hash:
- Spice it up: A pinch of cayenne or some crushed red pepper flakes can cut through the richness and wake up your taste buds. Start with a little – you can always add more!
- Go veggie-heavy: Try sautéing colorful bell peppers along with your onions for a hash that’s as beautiful as it is delicious.
- Top it with chimichurri: This bright, herby sauce does for hash what salsa does for tacos – adds a fresh, acidic counterpoint that makes every bite more interesting.
- Switch up the herbs: Classic hash typically features parsley, but why not try rosemary for a woodsy touch, sage for something earthy, or dill for a completely different flavor direction?
Storage & Make-Ahead Information
One of the things I love most about corned beef hash is how flexible it is – you can make it ahead in stages or store leftovers for those mornings when you need breakfast in a hurry.
Storage Guidelines
To keep your hash tasting great (and safe to eat):
- Refrigerate your cooled hash in an airtight container, where it’ll stay good for 3-4 days
- Freeze it if you need longer storage (up to 3 months)
- I like to freeze in single-portion containers – perfect for solo breakfasts
- Leave about 1/4-inch of space at the top of your containers – the hash will expand a bit as it freezes
Reheating Methods
How you reheat your hash makes a big difference in how it turns out:
If you’re after that crispy texture again:
- Heat up a skillet, add a little butter or oil
- Spread your cold hash in an even layer
- Press it down with your spatula (just like when you first made it)
- Let it cook without poking at it for 3-4 minutes
- Flip it in sections and repeat until it’s hot and crispy again
If you’re in a morning rush:
- The microwave works in a pinch, though you’ll lose some of that crispiness
- Pro tip: After microwaving, pop it under the broiler for a minute to get some of that crunch back
Fun fact: Some hash lovers (myself included) actually enjoy it cold, straight from the fridge. Don’t knock it till you’ve tried it!
Cultural & Historical Context
Corned beef hash isn’t just delicious – it’s a dish with stories to tell, woven into American food culture in ways that go well beyond its Irish-American connections.
American Connection
- Those canned versions like Libby’s that hit shelves in the early 1900s still trigger warm memories for many Americans who grew up with them
- It’s the quintessential diner classic – slide onto any counter stool in America and you’ll likely find it on the menu any time of day
- While we go crazy for it around St. Patrick’s Day, plenty of us crave it all year round
- It’s part of that resourceful cooking tradition where creative home cooks transformed leftovers into something new and delicious
During World War II, when meat was carefully rationed, canned corned beef hash became a household staple – an affordable, accessible protein when options were limited. This era really cemented hash’s place in American food culture. It’s why so many folks still have a soft spot for those canned versions, even as more of us are making it from scratch these days.
FAQ About Corned Beef Hash
What is corned beef hash in a can made of?
Pop open a can of corned beef hash and you’ll find pre-cooked corned beef, diced potatoes, onions, and various seasonings. Brands like Libby’s and Hormel have been stocking pantry shelves with their versions for decades. They’re definitely convenient for those mornings when you need breakfast in minutes, but they do come with higher sodium and preservatives that you won’t find in a homemade version.
The texture? That’s where canned and homemade really part ways. Canned hash has that uniform, soft consistency throughout – nothing wrong with that if that’s what you’re after! Many folks who grew up with the canned stuff actually prefer it, wrapped up as it is in childhood memories. But if you’re after those contrast-rich crispy edges and varied textures, homemade is the way to go.
What is the secret to best corned beef?
What’s the real secret to amazing corned beef? It comes down to two things: how it’s cured and how it’s cooked. When you’re hunting for that perfect piece of beef for your hash, look for meat cured in a balanced brine with salt, sugar, sodium nitrite (that’s what gives corned beef its signature pink color), and a mix of spices like peppercorns, bay leaves, mustard seeds, and coriander.
When it comes to cooking, patience is your best friend. The “low-and-slow” method isn’t just fancy chef talk – it’s essential. Whether you’re using your trusty slow cooker, a Dutch oven, or that pressure cooker you got last Christmas, gentle cooking over time breaks down all the tough stuff in the brisket while keeping everything moist and tender. The folks at The Country Cook say the sweet spot is an internal temperature of 195°F (90°C), which transforms the collagen into gelatin – that’s what gives you that melt-in-your-mouth texture.
Here’s a little hash-specific tip: for the perfect dice that holds up during frying, aim for a slightly firmer corned beef (around 180°F/82°C) and make sure to chill it thoroughly before cutting. I’ve learned the hard way that trying to cut warm corned beef is like trying to dice jello – not pretty!
How to make a good corned beef hash?
What’s the real secret to making hash that’ll have everyone asking for seconds? It comes down to four key moves:
- Start by par-cooking those potatoes in vinegar water: This little step makes all the difference in getting that perfect texture foundation
- Give each ingredient its own time to shine: Cook your onions, potatoes, and meat separately before bringing them together for the final show
- Press, don’t stir: Once everything’s in the pan, press it down firmly and then step away from the stove! This creates that irresistible crispy crust
- Channel your inner patience: Resist the urge to constantly stir – those undisturbed minutes are when the brownness (and flavor) happens
One more thing that separates good hash from great hash: season as you go, not just at the end. Each component should taste good on its own before they all come together in the final dish.
What to mix with corned beef hash?
Once your hash is ready, what should you serve with it? Here are some perfect pairings:
Top it off with:
- A fried or poached egg with a runny yolk that creates an instant “sauce” when broken (my personal favorite!)
- A few dashes of hot sauce – Tabasco’s vinegary kick or Cholula’s round heat both work beautifully
- A spoonful of bright chimichurri sauce
- A dollop of horseradish cream for a zingy contrast
- A shower of fresh herbs like snipped chives, chopped parsley, or feathery dill
- Slices of creamy avocado
When to serve it:
- For a hearty breakfast that’ll keep you full for hours
- As a no-fuss dinner on busy weeknights
- The day after St. Patrick’s Day when you’re wondering what to do with all that leftover corned beef
- Honestly? Anytime you need a comforting meal that feels like a hug on a plate
The trick is thinking about balance – hash is rich and savory, so look for toppings that bring acidity, freshness, or creaminess to the table.
Craving more stick-to-your-ribs comfort food? My Beef and Noodles Recipe hits that same satisfying, homestyle note that makes us all feel like we’re back at grandma’s table.
Conclusion: Celebrating a Classic Comfort Food
There’s something beautiful about corned beef hash – the way it transforms humble ingredients into something truly special through a little technique, some patience, and an understanding of what makes food taste good. Whether you’re giving yesterday’s corned beef dinner a delicious second act or starting from scratch with a craving for comfort food, the principles are the same: treat your ingredients with respect, pay attention to texture, and trust in the magic that happens in a hot skillet.
Now that you understand the science behind those perfectly textured potatoes, the importance of managing your heat just right, and why patience is so crucial for developing those irresistible crispy bits, you can take this diner classic to new heights in your own kitchen. Next time you find yourself with leftover corned beef – or even when you’re just in the mood for something deeply satisfying – remember the simple pleasure of a well-made hash, where every bite offers that perfect harmony of crispy edges, tender centers, and rich, savory flavor.
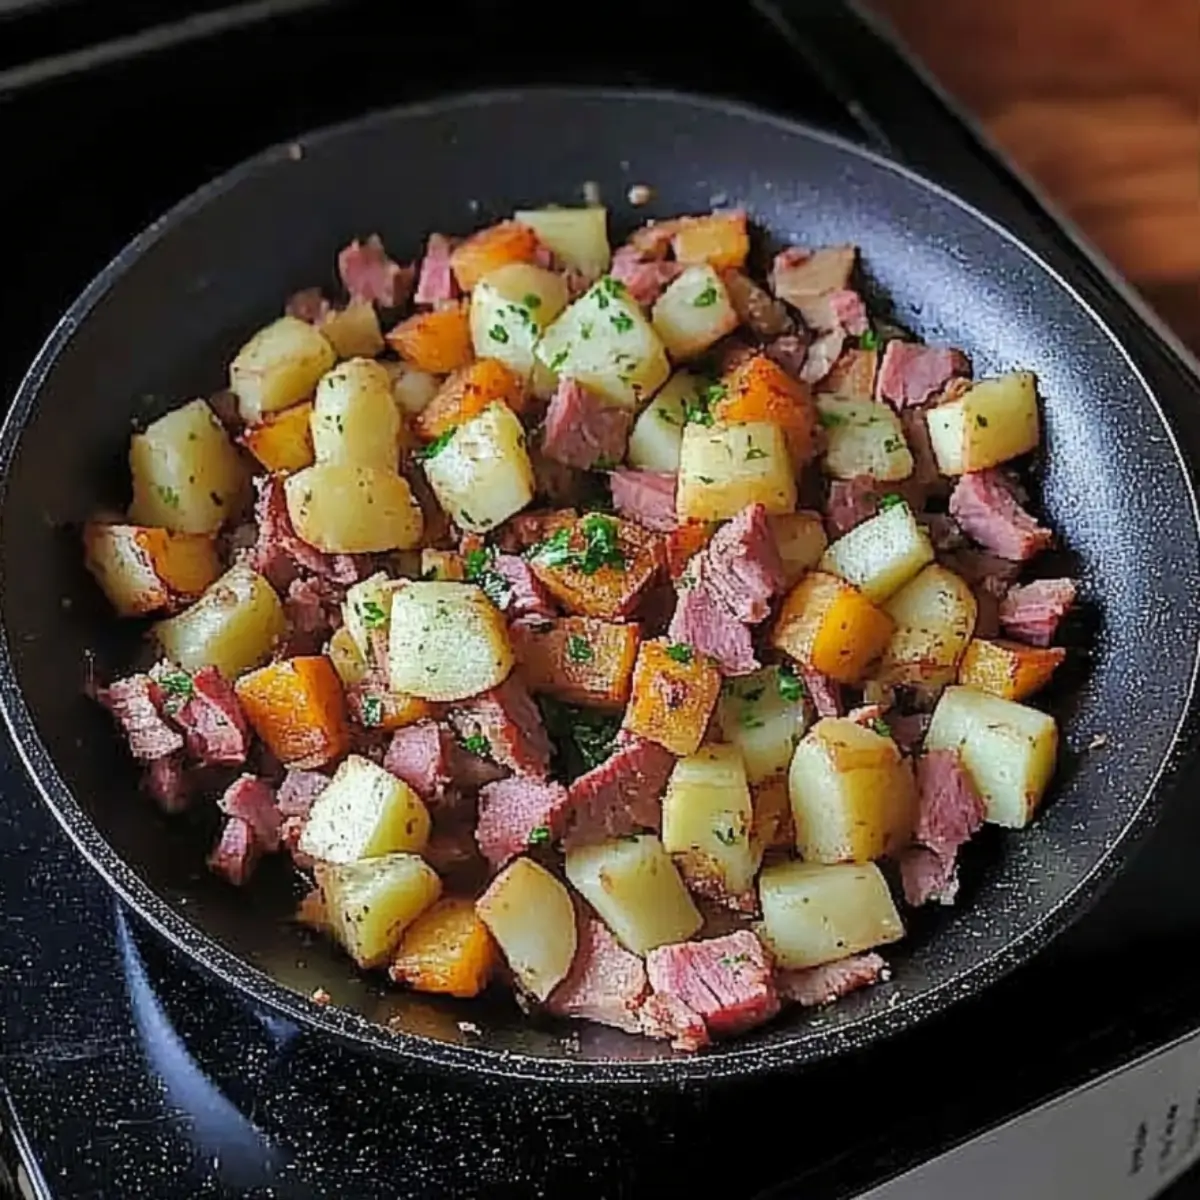
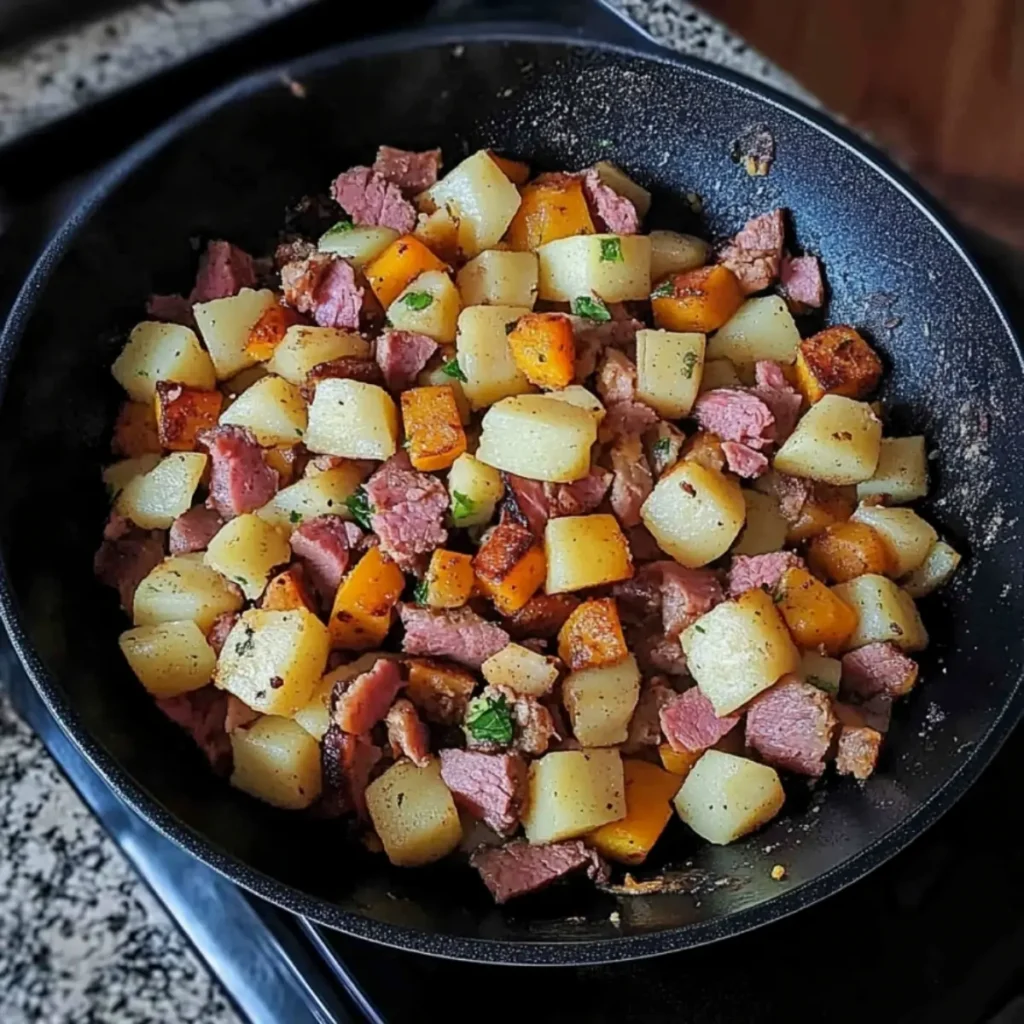
PrintThe 4-Ingredient Crispy Corned Beef Hash Recipe Ready in 30 Minutes
Corned beef hash is a comforting and delicious dish that combines crispy potatoes, savory corned beef, and caramelized onions. It’s perfect for enjoying as a hearty breakfast, a no-fuss dinner, or as a creative way to use leftovers from a corned beef feast.
- Prep Time: 15 minutes
- Cook Time: 30 minutes
- Total Time: 45 minutes
- Yield: 4 servings 1x
- Category: Breakfast, Main Course
- Method: Stovetop
- Cuisine: American, Irish
- Diet: Kosher
Ingredients
- 2 cups chopped corned beef
- 3–4 cups diced potatoes (preferably Yukon Gold)
- 1 large onion, chopped
- 2 tablespoons butter
- 1 tablespoon oil (canola or grapeseed)
- Salt and pepper to taste
- 1–2 tablespoons vinegar (for par-cooking potatoes)
Instructions
- Par-cook the diced potatoes in acidulated water (water with vinegar) for about 5-10 minutes. Drain well and let cool for at least 15 minutes.
- In a large skillet, heat 1 tablespoon of butter and 1 tablespoon of oil over medium heat.
- Add the chopped onion and cook until soft and caramelized, about 5 minutes.
- Remove onions and add par-cooked potatoes to the skillet, pressing them into an even layer. Cook until they have a golden crust, about 5-7 minutes per side.
- Add the corned beef to the skillet, combine with potatoes and onions. Cook until the corned beef is warmed through and slightly crispy on the edges.
- Season with salt and pepper to taste, and serve hot.
Notes
- For extra flavor, consider adding bell peppers, carrots, or herbs such as parsley and thyme.
- Achieving a crispy texture requires patience – ensure each layer cooks undisturbed for several minutes.
- Consider using a mixture of butter and neutral oil to avoid burning.
- Feel free to experiment with spices like cayenne or red pepper flakes for a spicier version.
Nutrition
- Serving Size: 1 serving
- Calories: 350
- Sugar: 2g
- Sodium: 900mg
- Fat: 20g
- Saturated Fat: 8g
- Unsaturated Fat: 11g
- Trans Fat: 0g
- Carbohydrates: 25g
- Fiber: 3g
- Protein: 15g
- Cholesterol: 50mg
Keywords: Corned beef hash, comfort food, leftover corned beef, breakfast, crispy potatoes